I've taken issue with it, however, and needed to correct something. It's tall. Very tall. A claimed 31.8 inches. I've tried a Corbin seat but still too tall. I found a system by Mizu. A lowering kit which for the Buell means a one piece kit. The collar lowers the seat of the rear shock spring. But why try to explain when I can show it in pictures:
The kit (next to the K&N filter)

Remove upper and lower bolts.
Cut the zip ties at the top of the shock, one on the preload hose tied to the harness on the left and another tying a breather hose on the right for egress:

Unbolt preload unit. 2 bolts can be found up under the seat pan. Then remove the screw for the shock reservoir clip. Unbolt ECM so it's out of the way. The lower nut for the ECM will escape to those hard to reach places if you don't get a finger on it from underneath.
Shock can now slide up and out.

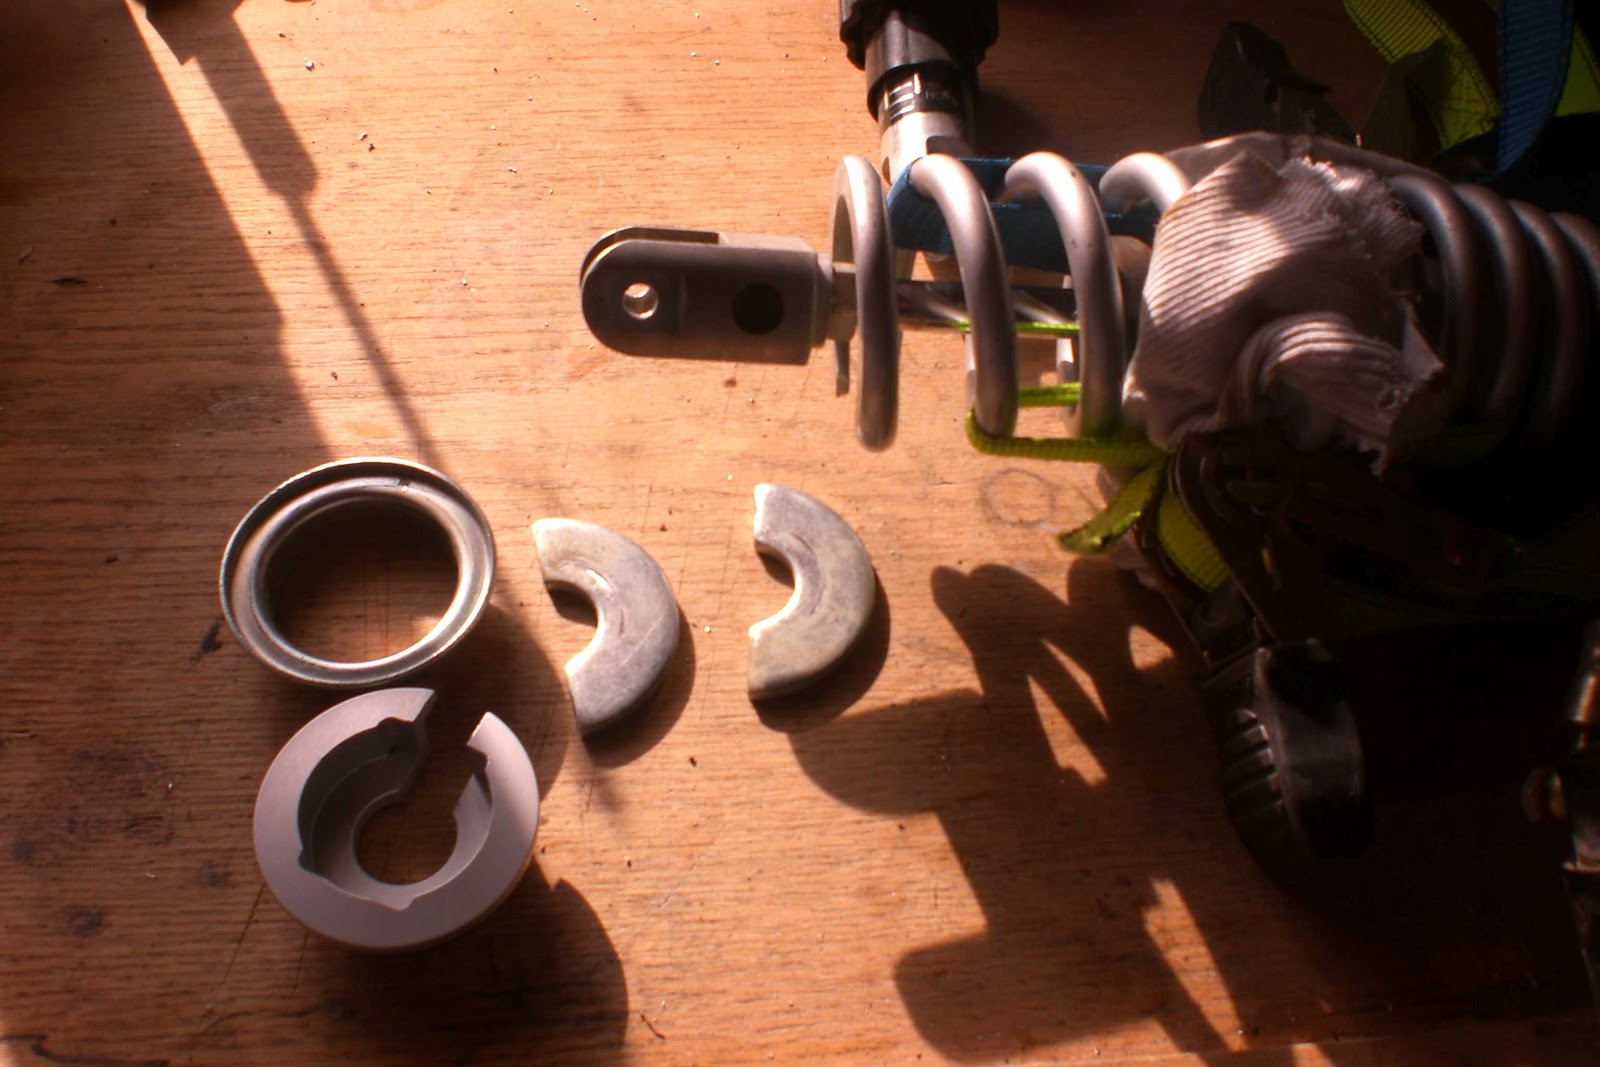
A spring compressor would work well at this point but I didn't have one. I used 2 ratchet straps on either side to compress the coil spring to remove the original spring seat and half moon washer setup and make room for the lowering kit. This takes some strength and proved difficult but effective none the less. I had read of this method on the web, of course.

As you can see in the below picture, there is the original seat and half moon washers above the single unit lowering kit.
The shock now has the lowering kit installed.

Throw that puppy back onto the bike. But wait for it: the problem with mail order parts...there is no mention of the lower mud guard in the way of the now lowered coil spring and collar. I had to drill a hole on either side and file a small cutout from the guard's lip. Note: I used the full manual for remove and replace instructions. This is necessary as there are torquing specs involved. Also, I use lock-tight on everything.

And here are the results - BEFORE:

And AFTER:

Obvioulsy not flat footed but a significant difference. This is very evident while "walking" the bike around when in the saddle.
Now I'm waiting for the snow to clear out and the weather to improve. I've got time for the oil change and filter...


